Adequate hydration is crucial for the growth and survival of your chicks. If you’re interested in providing a constant water source for your little ones, crafting a DIY Chick Waterer might be the perfect solution.
It’s cost-effective, simple, and a fantastic way to ensure your chicks are well-hydrated. This article will guide you through creating your own DIY Chick Waterer, covering everything from the necessary materials to detailed step-by-step instructions.
Why Opt for a DIY Chick Waterer?
Creating a DIY Chick Waterer comes with several benefits:
Read Also:
Cost-Effective: Making your chick waterer can save you money as you will use common, inexpensive materials.
Customizable: You can customize the size and capacity of the waterer based on the number of chicks you have.
Easy Maintenance: DIY waterers are easy to clean and refill, ensuring your chicks always have access to fresh, clean water.
Materials Needed for a DIY Chick Waterer
Before we begin crafting our chick waterer, it’s important to gather all necessary materials:
- A clean, empty plastic container with a lid (A 1-gallon jug or a 5-gallon bucket can work, depending on the number of chicks you’re catering to).
- Chicken waterer cups or nipples (These can be found online or at a local farm supply store).
- A drill with an appropriately sized bit to match your chicken waterer cups or nipples.
Creating Your DIY Chick Waterer: Step-by-Step Guide
Here is the step by step guide to create DIY Chick Waterer:
Step 1: Preparation
First, ensure your plastic container is clean and dry. The size of the container you choose will depend on the number of chicks you have; the more chicks, the larger the container should be.
Step 2: Drilling Holes
Next, using your drill, make holes in your container where you want your waterer cups or nipples to go. Typically, these are positioned a few inches from the base of the container, but the height can be adjusted based on the size of your chicks. Remember, you want the chicks to access the water easily.
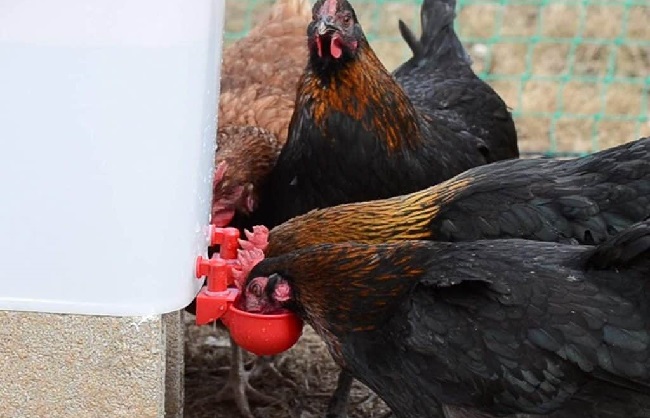
Step 3: Installing the Cups or Nipples
After drilling your holes, it’s time to install your chicken waterer cups or nipples. These should screw easily into the holes you’ve drilled. Make sure they’re secure and that there are no leaks around the edges.
Step 4: Filling and Sealing the Waterer
With your cups or nipples installed, you can now fill your container with fresh, clean water. Once filled, secure the lid tightly on the container. The water will not flow out until the cups or nipples are pecked by the chicks, reducing the risk of spillage and ensuring clean water supply.
Read Also:
Conclusion
Creating your own DIY Chick Waterer is a cost-effective, simple, and practical solution to keeping your chicks well-hydrated. With just a few common materials and a bit of time, you can ensure that your chicks always have access to the clean, fresh water they need to thrive. So why not give it a try? Your chicks will thank you!
Remember, it’s crucial to regularly check and maintain your DIY Chick Waterer, cleaning it thoroughly and frequently to prevent the buildup of dirt or bacteria that could harm your chicks. Here’s to a happy, healthy flock!


