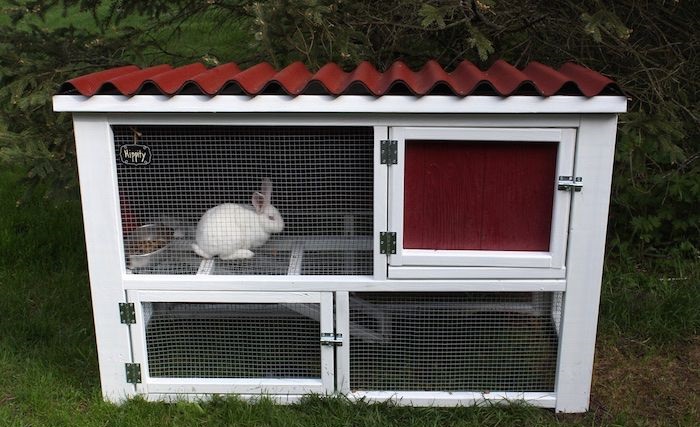
Some Best Rabbit Hutch DIY To Perform at Home

If you’re a rabbit owner, providing a safe, comfortable, and spacious environment for your furry friend is essential.

A rabbit hutch is a perfect solution for housing your pet, but store-bought hutches can often be expensive and may not meet all of your rabbit’s needs. The good news is, you can create a custom DIY rabbit hutch at home!

Not only is this a cost-effective option, but it also allows you to build a hutch that perfectly suits your space and your rabbit’s lifestyle.

In this article, we’ll explore some of the best rabbit hutch DIY ideas that are easy to perform at home, along with tips and essential materials you’ll need to get started.

Rabbit Hutch DIY

Understanding Your Rabbit’s Requirements

Every rabbit is an individual with distinct needs. The first step in planning your DIY rabbit hutch is to assess the specific needs of your rabbit.

Read Also:

  1. Meat Rabbit Breeds
  2. What Animals Eats a Rabbit
  3. White and Black Rabbit Breeds

Size Considerations

Rabbits need ample space to move around, play, and exercise. As a general rule, the hutch should be at least four times the size of your rabbit when they’re fully stretched out. If you have multiple rabbits, you’ll need to increase the size accordingly.

Breed-Specific Needs

Different breeds have different needs. Larger breeds will require more space, and certain breeds may require specific features for their comfort and health.

Why Build a DIY Rabbit Hutch?

Building a DIY rabbit hutch comes with several benefits:

  1. Customization: You can design the hutch to suit your rabbit’s size, breed, and activity level. Whether you need a multi-level hutch or an outdoor shelter, DIY projects allow for full customization.
  2. Cost-Effective: A DIY rabbit hutch can be significantly cheaper than buying a pre-made one from the store. You can use affordable materials and still create a high-quality living space.
  3. Quality Control: By building your own hutch, you can ensure that it’s safe, sturdy, and made with rabbit-friendly materials.
  4. Personal Satisfaction: There’s something rewarding about creating a comfortable home for your rabbit with your own hands.

Now, let’s explore some of the best DIY rabbit hutch ideas that you can build at home.

Choosing the Perfect Location

Where you place your hutch is crucial. It should be in a sheltered, shaded area to protect your rabbit from extreme weather conditions and direct sunlight.

Outdoor vs. Indoor Hutches

Whether you choose to place your hutch indoors or outdoors depends on several factors. Outdoor hutches will require more weatherproofing and security measures, while indoor hutches may need more consideration regarding cleanliness and home aesthetics.

Material Choices: Safety and Durability

When selecting materials for your DIY rabbit hutch, choose ones that are safe, non-toxic, and durable. Pressure-treated wood can be harmful to rabbits, so opt for untreated wood instead.

Wire Mesh

Wire mesh is a popular choice for the walls of the hutch as it allows good ventilation. However, the mesh’s gaps should be small enough to prevent your rabbit from sticking its head out and potentially getting stuck.

Flooring

Rabbits have delicate feet that can be injured by wire flooring, so a solid floor is a must. You can use a piece of plywood, which should be covered with a soft material like hay or a washable blanket to provide comfort.

Designing the Hutch

Creating Separate Areas

A well-designed rabbit hutch should include separate areas for sleeping and playing. You might consider adding a second level to the hutch to increase the available space without increasing the hutch’s footprint.

Access for Cleaning

Cleaning the hutch regularly is vital for your rabbit’s health. Design your hutch with a door or opening that makes it easy to reach all parts of the hutch for thorough cleaning.

Finalizing the DIY Rabbit Hutch

Checking for Safety

Once your DIY rabbit hutch is complete, do a thorough check for any potential hazards. Make sure there are no sharp edges, and all the latches are secure.

Maintaining the DIY Rabbit Hutch

Once your hutch is complete, its upkeep is important. Regular cleaning, along with periodic checks for wear and tear, will keep the hutch safe and comfortable for your rabbit.

Best Rabbit Hutch DIY Ideas to Try at Home

1. Basic Wooden Rabbit Hutch

Basic Wooden Rabbit Hutch

A basic wooden rabbit hutch is one of the easiest DIY projects you can tackle, especially if you’re new to woodworking. This type of hutch provides a sturdy, simple structure that can be used both indoors and outdoors.

Materials Needed:

  • Plywood or wooden planks for the base and sides
  • Wire mesh for the doors and windows
  • Hinges for the doors
  • Nails or screws
  • Saw and hammer
  • Paint or wood stain (optional)
  • Latches for securing doors

Instructions:

  1. Measure and Cut the Wood: Decide on the size of your hutch, and cut the plywood or wooden planks accordingly. For a small rabbit, a hutch measuring 4 feet long, 2 feet wide, and 3 feet high is a good starting point.
  2. Build the Frame: Construct the base and sides of the hutch using wooden planks. Attach the pieces together using nails or screws.
  3. Attach the Wire Mesh: Cover the front and windows of the hutch with wire mesh to allow ventilation. Secure the mesh with nails or screws.
  4. Install the Door: Cut a section of the front wall for the door, attach hinges, and add a latch to keep the door secure.
  5. Add a Roof: Use plywood to create a slanted roof to protect the hutch from rain if it’s being placed outdoors.
  6. Paint or Stain (Optional): You can paint or stain the wood to match your home’s decor, but make sure to use non-toxic, pet-safe paint.

2. Multi-Level Indoor Rabbit Hutch

If you’re looking for an indoor rabbit hutch with multiple levels to give your rabbit more space to explore, a multi-level hutch is a great DIY project. Multi-level hutches are perfect for active rabbits that love to hop and climb.

Materials Needed:

  • Plywood or MDF boards for the structure
  • Wooden planks for levels and ramps
  • Carpet or rubber mats for flooring
  • Wire mesh for safety
  • Hinges and latches
  • Screws and a drill

Instructions:

  1. Design the Layout: Sketch a design for a multi-level hutch, including ramps and platforms for your rabbit to explore. Measure the space where you plan to place the hutch.
  2. Build the Base: Construct the base of the hutch using plywood or MDF boards. Ensure the base is large enough to give your rabbit plenty of room to hop around.
  3. Add Multiple Levels: Create additional levels within the hutch by securing wooden planks as platforms. Use small ramps or stairs to connect each level.
  4. Attach Wire Mesh: To prevent your rabbit from falling off the platforms, secure wire mesh around the open sides.
  5. Flooring: Add carpet or rubber mats to the flooring for traction, comfort, and to make cleaning easier.
  6. Install Doors: Install doors with hinges and latches for easy access to clean the hutch and interact with your rabbit.

3. Outdoor Rabbit Hutch with Run

If you want to give your rabbit outdoor time while keeping them safe from predators, building an outdoor hutch with an attached run is the perfect solution. This design allows your rabbit to roam, graze, and enjoy fresh air.

Materials Needed:

  • Wooden planks for the hutch frame
  • Chicken wire or mesh for the run
  • Roofing material (such as asphalt shingles or metal)
  • Hinges and latches
  • Screws and a drill
  • Waterproof sealant (optional)

Instructions:

  1. Build the Hutch Structure: Construct a sturdy wooden frame for the hutch. Include space for a sleeping area and a raised platform to keep the hutch off the ground.
  2. Create the Attached Run: Use wooden planks to build a rectangular frame for the run. Cover it with chicken wire or mesh on all sides, including the top, to prevent predators from accessing the run.
  3. Connect the Hutch and Run: Cut an opening in the hutch that leads to the run and install a small door or ramp so your rabbit can access the run freely.
  4. Add a Roof: Place a weatherproof roof over the hutch to protect your rabbit from rain and direct sunlight. The run can remain uncovered if you live in a dry area, or you can add a tarp for additional shade.
  5. Seal the Wood (Optional): Apply a waterproof sealant to the wood to protect it from the elements and increase the hutch’s lifespan.

4. Stackable Rabbit Hutch

If you have multiple rabbits or plan to breed them, a stackable hutch design allows you to house several rabbits in a compact space. This DIY hutch is great for owners with limited outdoor or indoor space.

Materials Needed:

  • Wooden boards for multiple layers
  • Wire mesh for ventilation
  • Hinges, latches, and screws
  • Divider panels (optional)
  • Roofing material (if used outdoors)

Instructions:

  1. Build the Base Hutch: Start by constructing a single-layer hutch using wooden boards. Build the base and sides, and attach wire mesh for ventilation.
  2. Add Multiple Tiers: Build additional hutch levels using the same design. Each tier should have its own door for easy access and cleaning.
  3. Install Dividers (Optional): If housing more than one rabbit per level, you can add dividers between the sections to keep rabbits separate when needed.
  4. Stack the Hutches: Once each level is built, stack them securely on top of each other. Use screws or brackets to keep the structure stable and ensure it doesn’t wobble.
  5. Add a Roof: If the hutch is being used outdoors, install a waterproof roof to protect the rabbits from the elements.

5. Upcycled Furniture Hutch

A creative way to build a rabbit hutch is by upcycling old furniture like dressers, cabinets, or bookshelves into a rabbit habitat.

rabbit Upcycled Furniture Hutch

This DIY idea allows you to repurpose items you already have at home, reducing waste and adding a unique touch to your rabbit’s living space.

Materials Needed:

  • Old dresser, cabinet, or bookshelf
  • Wire mesh for ventilation
  • Hinges and latches for doors
  • Saw and screws

Instructions:

  1. Prep the Furniture: Remove the drawers or shelves from the furniture piece. If converting a dresser, you can keep some of the drawers to create separate areas for sleeping or playing.
  2. Install Wire Mesh: Cut sections of the furniture’s back or sides and replace them with wire mesh to provide ventilation.
  3. Create Access Doors: If the furniture doesn’t already have doors, create openings in the front, and install doors with hinges and latches for easy access.
  4. Add Levels and Ramps: Use leftover shelves or wood to create multiple levels inside the furniture, giving your rabbit more space to explore.

Read Also:

  1. Some Top Black Rabbit Breed
  2. Can You Give Rabbits Baths?
  3. What is Lion Head Rabbit Price?

Conclusion

A DIY rabbit hutch is more than a simple housing unit for your rabbit—it’s a labor of love. While it requires time, effort, and resources, seeing your furry friend enjoy their custom-made space is truly rewarding.

Always remember that the key to a successful DIY rabbit hutch is thoughtful planning, careful construction, and regular maintenance. Happy building!

FAQs

1. What materials are best for building a rabbit hutch?

Wood, wire mesh, and non-toxic paint or sealant are commonly used for building a sturdy and safe rabbit hutch. Be sure to use rabbit-safe materials, avoiding treated wood and toxic chemicals.

2. How big should a rabbit hutch be?

A rabbit hutch should be at least 4 times the size of your rabbit, with enough space for them to hop, stretch, and stand comfortably. Larger breeds may require more space. Ideally, the hutch should allow your rabbit to move around freely, with separate areas for sleeping, eating, and playing. For smaller rabbits, a hutch that is at least 6 feet long, 2 feet wide, and 2 feet tall is a good starting point.

3. Can I use untreated wood for a rabbit hutch?

Yes, untreated wood is the best choice for building a rabbit hutch, as it is free from harmful chemicals that could be dangerous for your rabbit if chewed on. Avoid pressure-treated wood, which contains chemicals that can be toxic to rabbits. Safe wood options include pine, cedar, and birch.

4. How can I make a rabbit hutch warm in winter?

To keep your rabbit warm in winter, insulate the hutch by adding straw bedding, installing solid walls to block wind, and using tarps or weatherproof covers to protect from rain or snow. You can also raise the hutch off the ground to avoid cold drafts and ensure the roof is watertight. Consider using heat pads or snugglesafe heating discs if your region experiences extremely cold temperatures.

5. Do I need to clean the rabbit hutch regularly?

Yes, it’s important to clean the hutch regularly to maintain hygiene and prevent health issues. Remove droppings, soiled bedding, and leftover food daily. A thorough cleaning, including changing the bedding and disinfecting surfaces, should be done at least once a week.

6. How can I prevent predators from getting into an outdoor rabbit hutch?

To protect your rabbit from predators, ensure the hutch is made from strong materials like wire mesh and has a secure lock. For outdoor hutches, consider placing a cover over the run area and installing an elevated floor to keep predators from digging underneath. Additionally, ensure that the wire mesh is sturdy and small enough to prevent animals like raccoons or birds from entering.